
As a wireless professional packet captures have become a big piece in finding solutions to problems, I recall hearing many times pcaps or it didn’t happen, my preferred method would be to gather these from the client or as close to the client as possible, but not always can you be everywhere at once when the issues occur. As a good alternative at times, I will gather the pcaps from the AP that the clients are connecting to. Lucky for me I have found 2 ways to achieve this using Ruckus APs. By using a SmartZone Controller or SSHing into the Ruckus AP.
Using a SmartZone Controller (Easy Method)
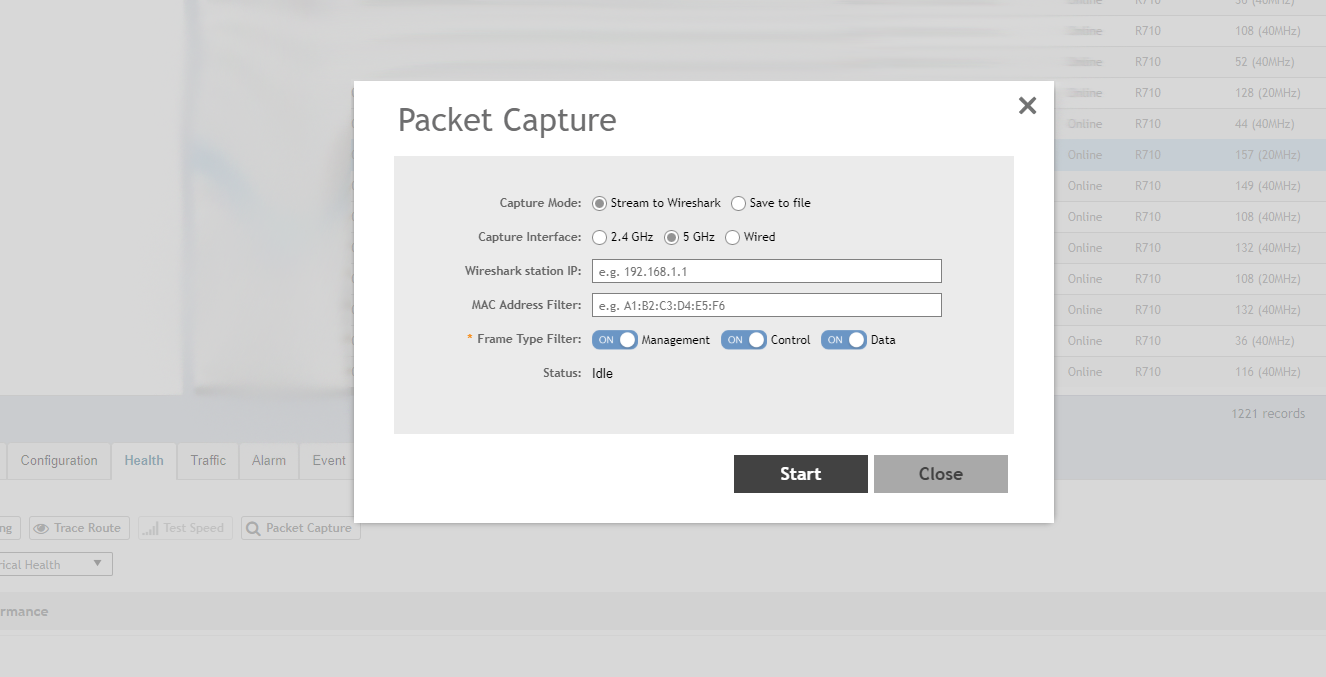
Log in to the Controller and find the AP you would like to gather the packets from. After clicking on the AP, you will want to scroll down and find the ‘Health’ tab, click on the button called ‘Packet Capture’, select your options, and click start. I usually stream directly to Wireshark so I can see the data live, providing your connection has enough bandwidth. You can have this data saved to the AP, but do note that the AP has a limited amount of storage on it, and packet captures can become quite large. From here go to the section about Wireshark Configuration, but when finished don’t forget to click stop on the capture window.
SSHing into a Ruckus AP (More complex method)
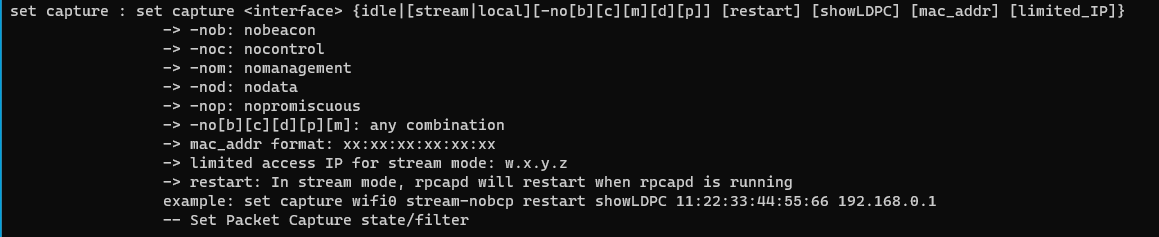
If you don’t have access to a SmartZone controller or if for some reason the steps above do not work for you can always SSH into the AP and issue a couple of commands to achieve the same result as above. First, get the IP address of the AP you would like to capture from and SSH into the device. You will need to provide login credentials to access the CLI of the AP. You will then want to issue the following command for capturing on the 5 GHz: ‘set capture wifi1 stream‘
This is the full list of all the possible options you could do:
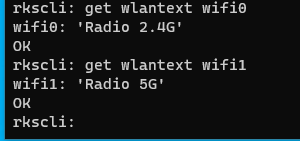
At the time of my writing and code version, the interfaces for the AP are as follows:
wifi0 – 2.4 GHz
wifi1 – 5 GHz
You can verify this by issuing the following command: ‘get wlantext <wlan name>’ (as more radios get added to these devices, I’m thinking they will follow this same scheme. )
Now continue on to the Wireshark section, but when you are done please issue the following command to disable the streaming option ‘set capture wifi1 idle‘ or reboot the AP.
Wireshark Configuration
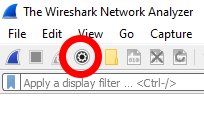
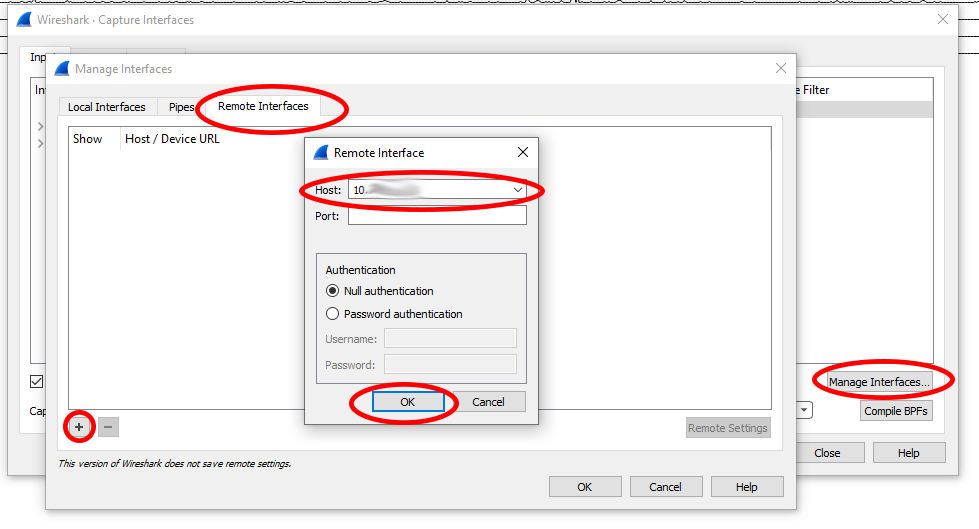
From here I would then fire up Wireshark and click on the capture options in the top left of the screen.
From the new menu that opens up click on ‘Manage Interfaces’ then click on the ‘Remote Interfaces’ tab, click on the ‘+’ sign and fill out the IP address of the AP you would like to capture from and click ‘OK’
At this point, you should see a lot of new interfaces in the list. (Look under the SSHing into Ruckus AP section and I talk about what interface is what.) Please note that there are wlan0 …. wlan40 these do not need to be checked as they are the individual SSIDs (use the command ‘get wlanlist‘ to see a mapping of SSID to the interface) and will only duplicate some of the data and throw off the totals, the radios themselves (wifi0 or wifi1) hold all of the data occurring for each frequency.
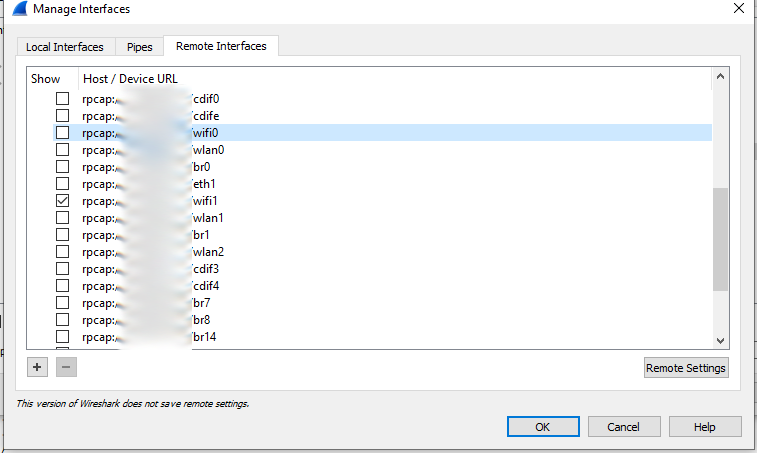
Uncheck all of them except for the interface you want to capture from click ‘OK’ and make sure your interface is highlighted and click start. If you did this right you should start seeing packets in Wireshark. When you’ve gathered the appropriate amount of packets click stop and save your data. (Don’t forget to also stop the packet capture on the controller or on the AP itself. Since these will stay active until they are stopped or the AP is rebooted.)
Hopefully, you found this information informative. Please let me know if you have any questions or comments about this.