
Following up on my previous post about Measuring Wall Attenuation, I figured I would show how I take these measurements and make them applicable. There are 2 ways to do this, the first requires you to modify an XML file that gets overwritten every time Ekahau is updated or reinstalled. The second, and the better way I feel, is to create a new project file and build this project to be used as a template. Matt Starling from the WiFi Ninjas does a great video tutorial on this: https://wifininjas.net/index.php/2020/08/05/wn-video-009-matts-number-one-ekahau-tip/
lets get started, first open up Ekahau and view the existing wall types.
You can either select a wall type to edit or create a new one, I am going to create a new one. Proceed to fill out the required information, (I was told to use .33 feet since I know the dB values I want to use. Note, that everything is converted to/from meters behind the scenes and width doesn’t impact the attenuation or the math, but it does impact the visualization area) now pick your colors. (I try to pick colors that are radically different so I know what they mean) From here repeat for each one of the dB values until you have the desired number of values.

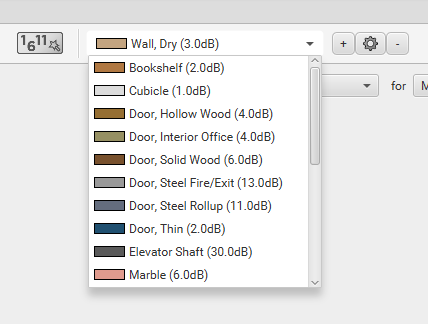
When you are finished you should have something that looks like this.

I would modify any other settings that you tend to use as a default, such as requirements and project notes, then save this file and note that it is a template. So when you go to start a new design you can open it and do a save as the name of your next project. This allows you to have all of these items saved and not have to create them each time. From here you can begin designing your floor plan with the measured data you took.
Feel free to comment on if you have any tips that you find helpful or if I need to explain anything better.