
Recently, I purchased a WiFiStand Wheeled Basic Kit from WIFIStand (https://wifistand.com/) after getting all the parts and putting it together everything looked great and very sturdy.
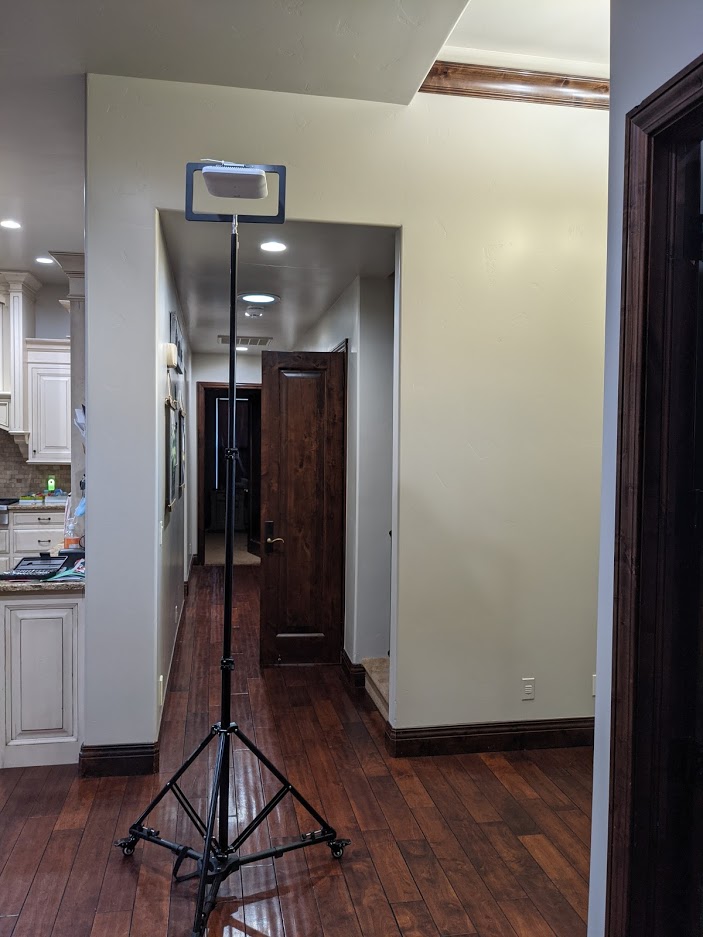
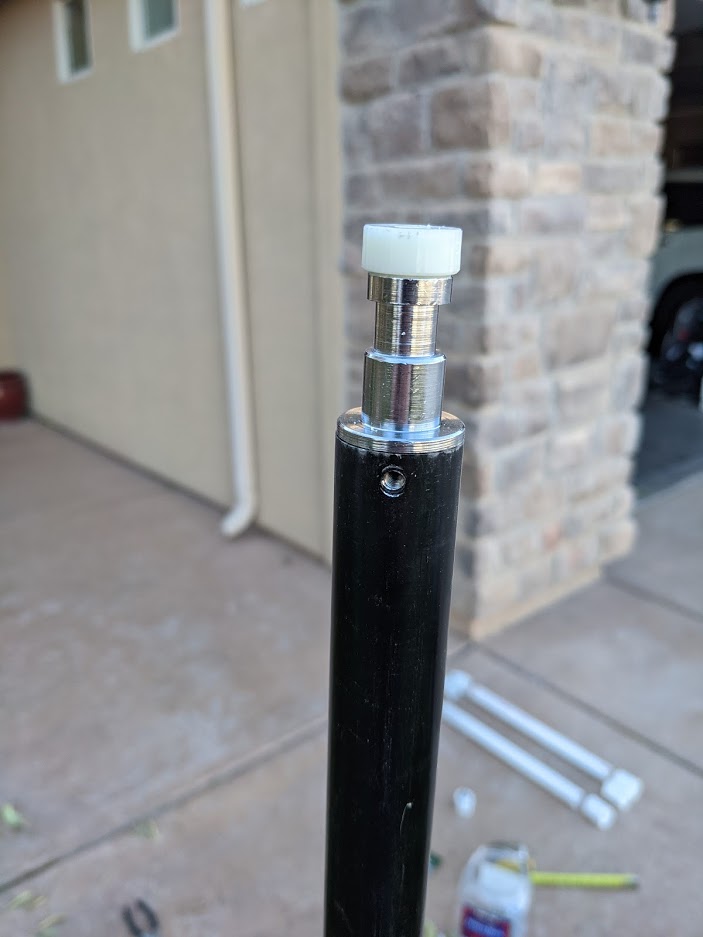
After using it a few times I noticed that the WIFIStand would extend out to 8 1/2 feet to the t-bar, and the ceilings I was testing this on were 11′. I wanted to try and make these APoS surveys as accurate as possible so I set out to find a solution. I didn’t want to buy a new tripod since I wasn’t sure if the wheel kit I had purchased would fit a new tripod. I initially thought I could find a 3d printed extension for the 1/4″ thumbscrew used to connect these to the WIFIStand, but I ended up with nothing and realizing this may not be the strongest solution. So I took to the WI-FI Pros Slack channel (https://wi-fipros.slack.com/) to look for answers. A user named DDT (or Optimus Grue) showed me some solutions he had come up with.
After seeing his photos, I liked the idea enough that I started to build my own and wanted to share my findings with others. So here is what I came up with, the parts needed, and how I assembled it.
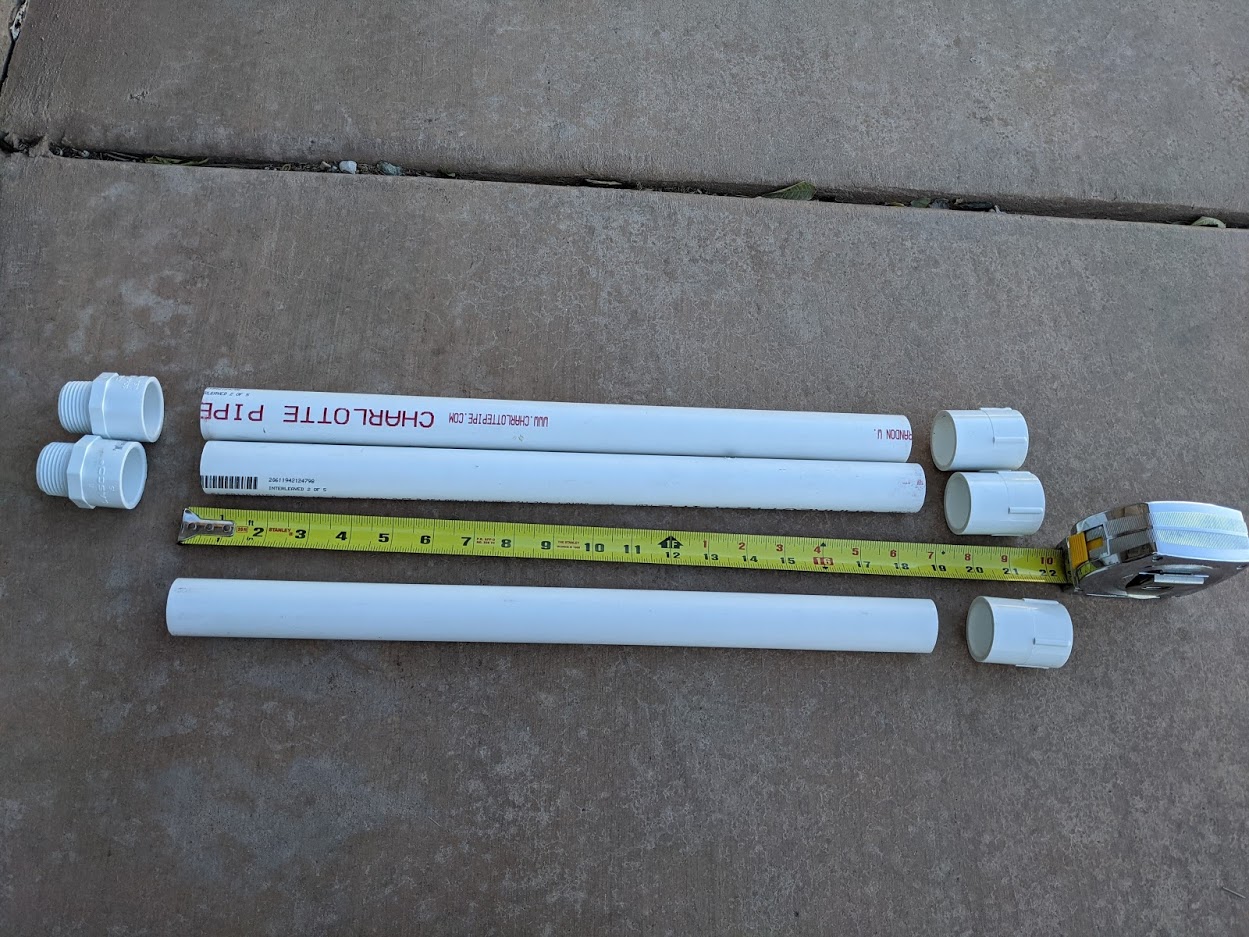
The Parts:
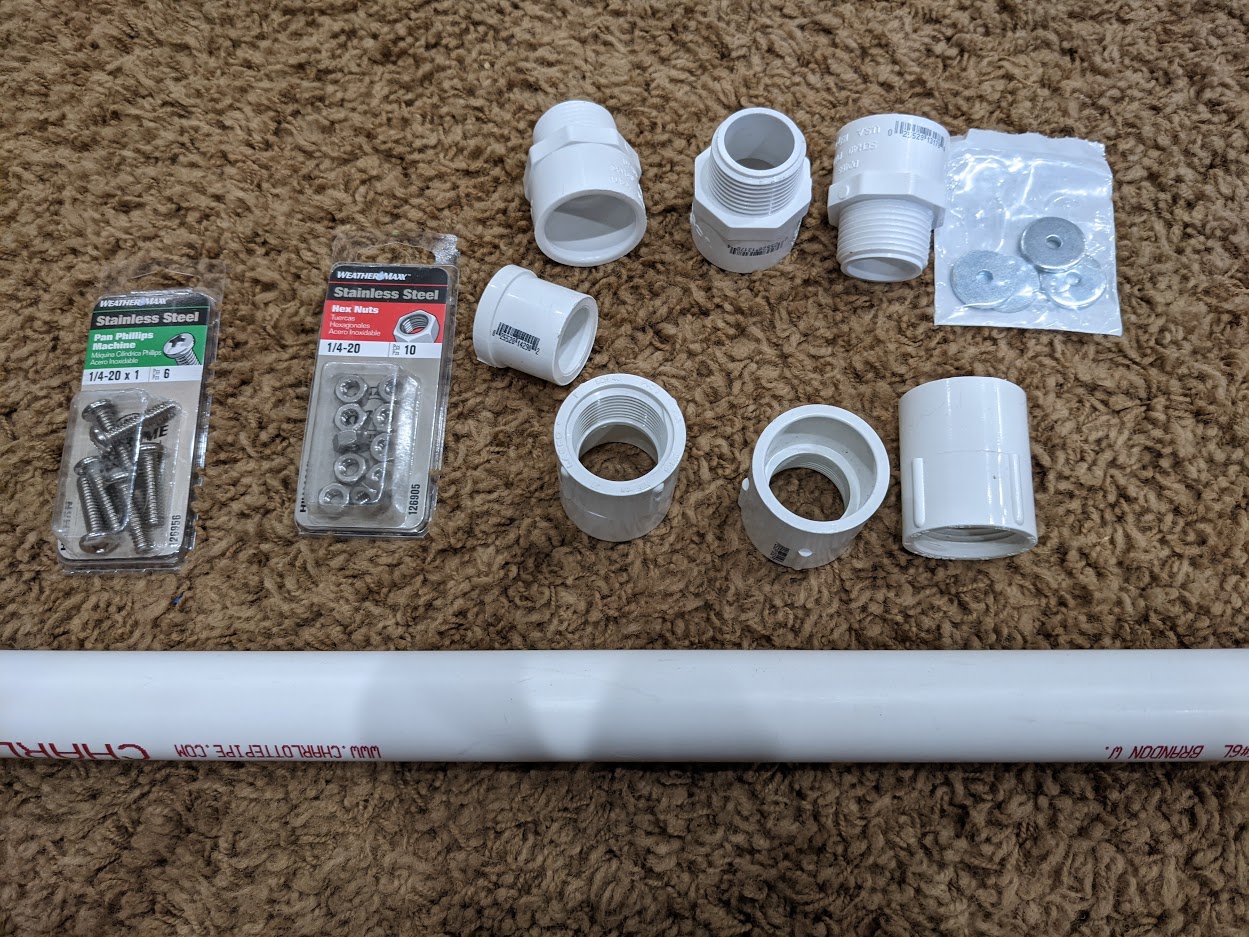
1 – #14-20 x 1-in Phillips-Drive Machine Screw
1 – #14-20 x 1-1/2-in Phillips-Drive Machine Screw
2 – 1/4-in x 1-in Zinc-Plated Standard (SAE) Fender Washers
2 – #14-20 Hex Nuts
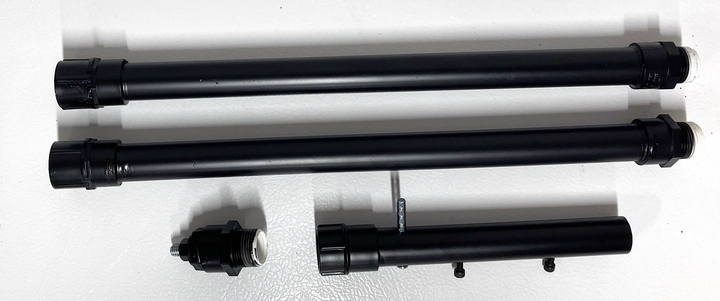
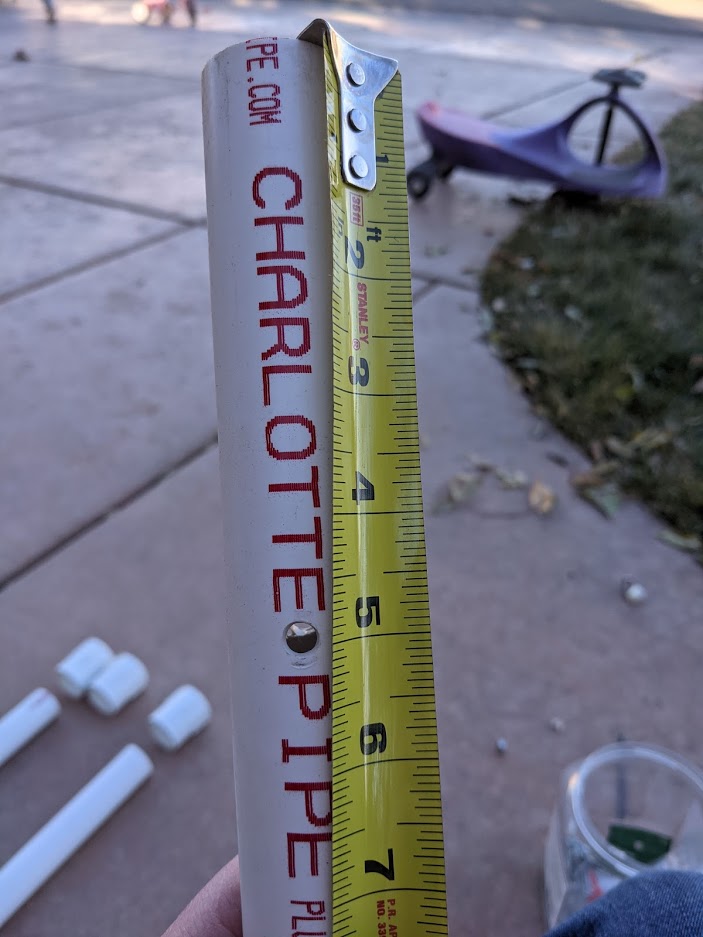
1 – 1-in x 5-ft Schedule 40 PVC Pipe
3 – 1-in x 1-in dia Coupling PVC Fitting
3 – 1-in x 1-in dia Adapter PVC Fitting
1 – 1-in x dia Plug Plug PVC Fitting
1 – All-Purpose Cement for PVC
1 – Can of Black Spray Paint
Some of these parts I already had and most I had to buy, but this cost me around $20-30 for this project.
Building the Extension:
First I started off by cutting the PVC into 18″ lengths, because I had bought a 5′ pipe I was able to do this 3 times with a little leftover. I then test fit the fittings and the pipes together to make sure I had everything correct.

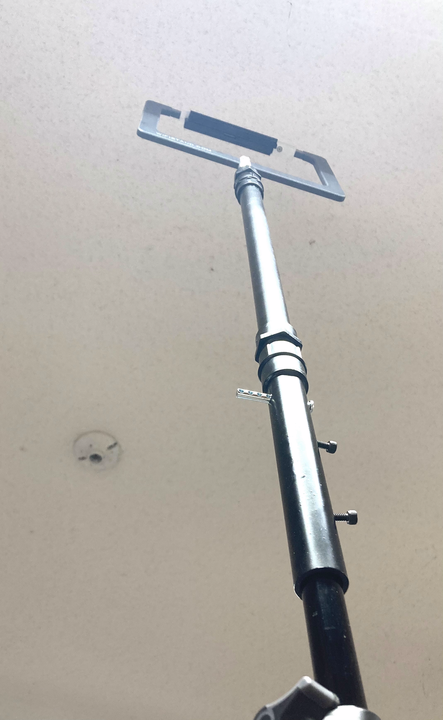
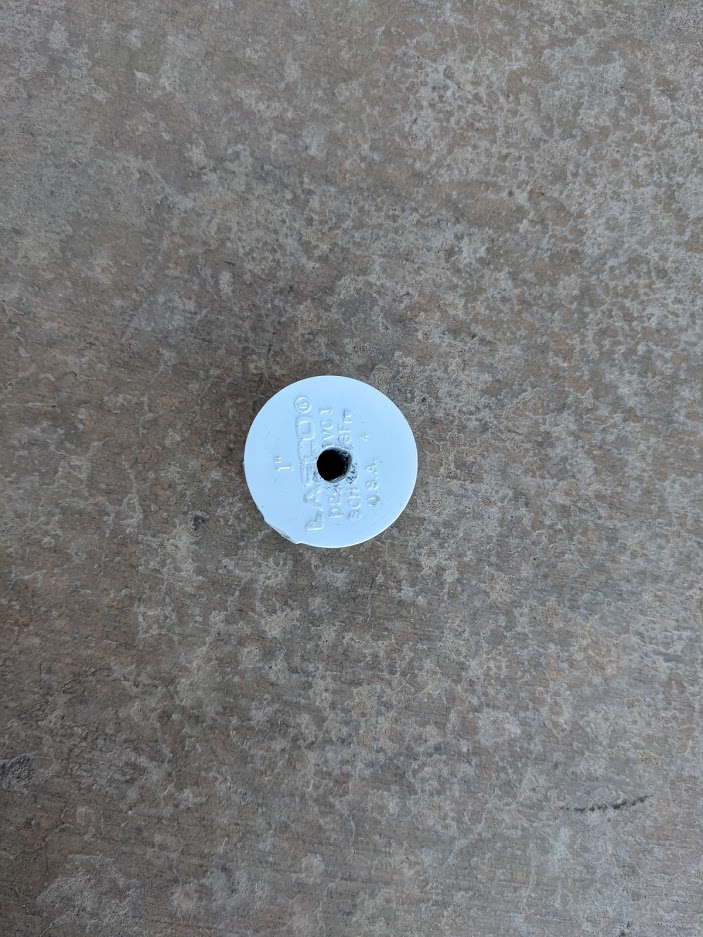
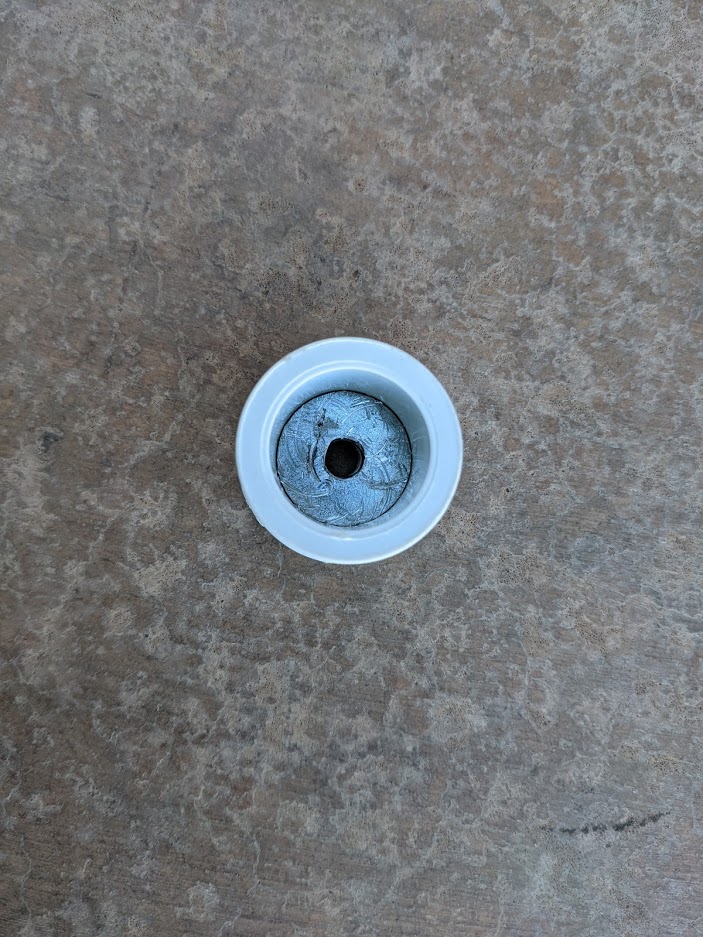
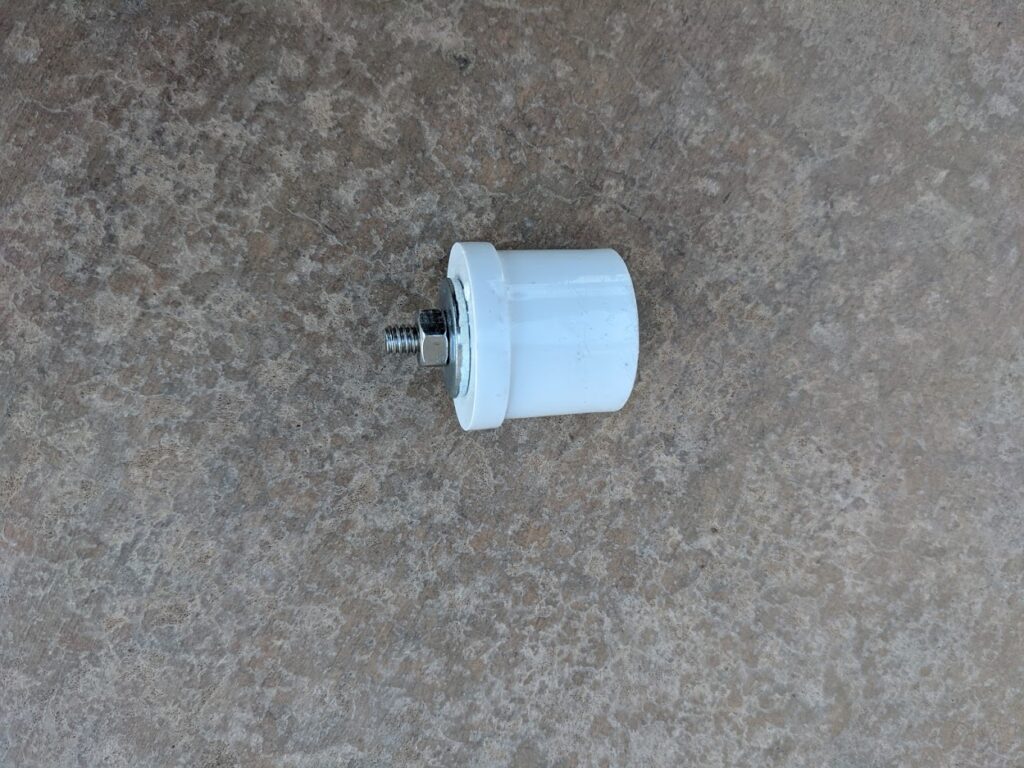
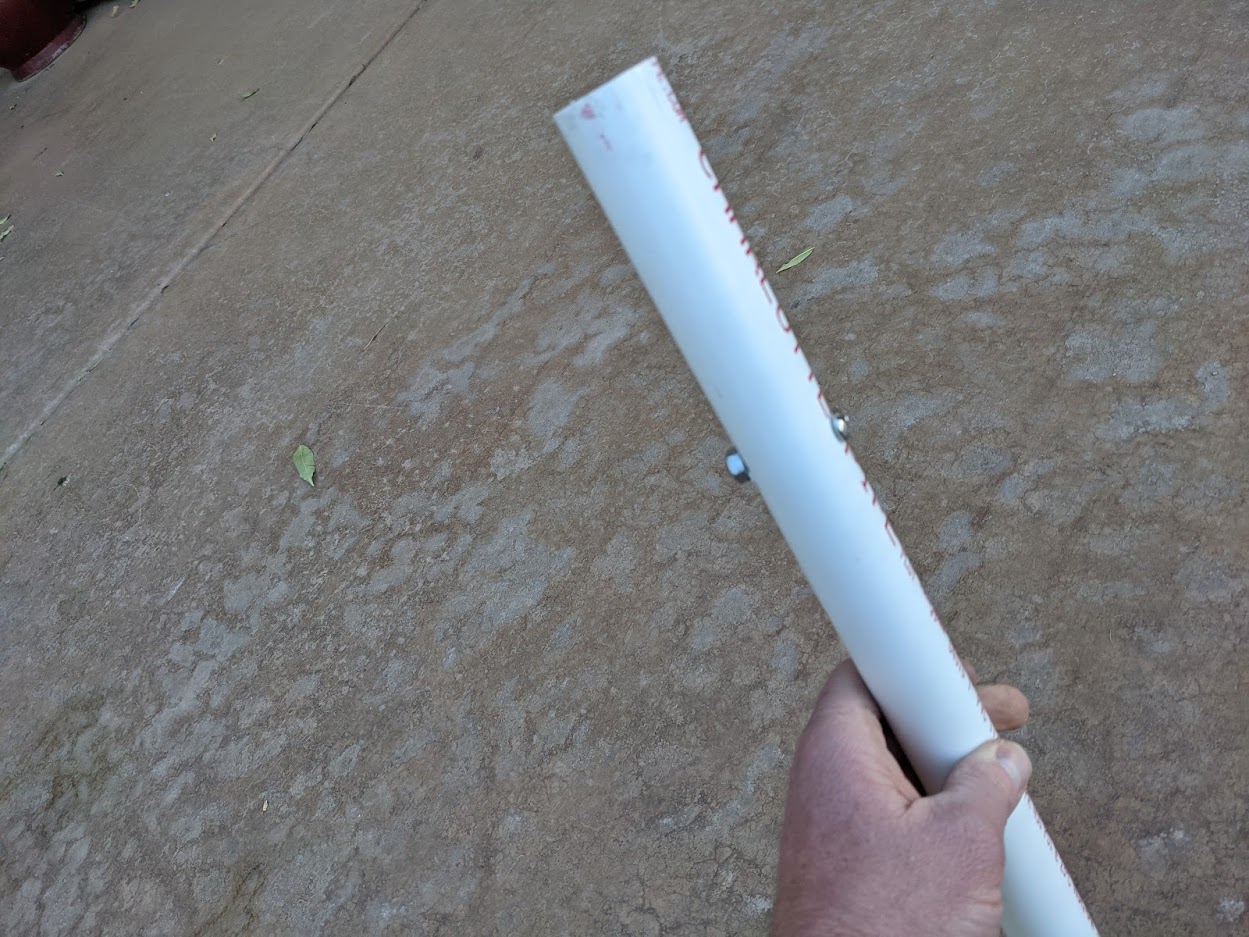
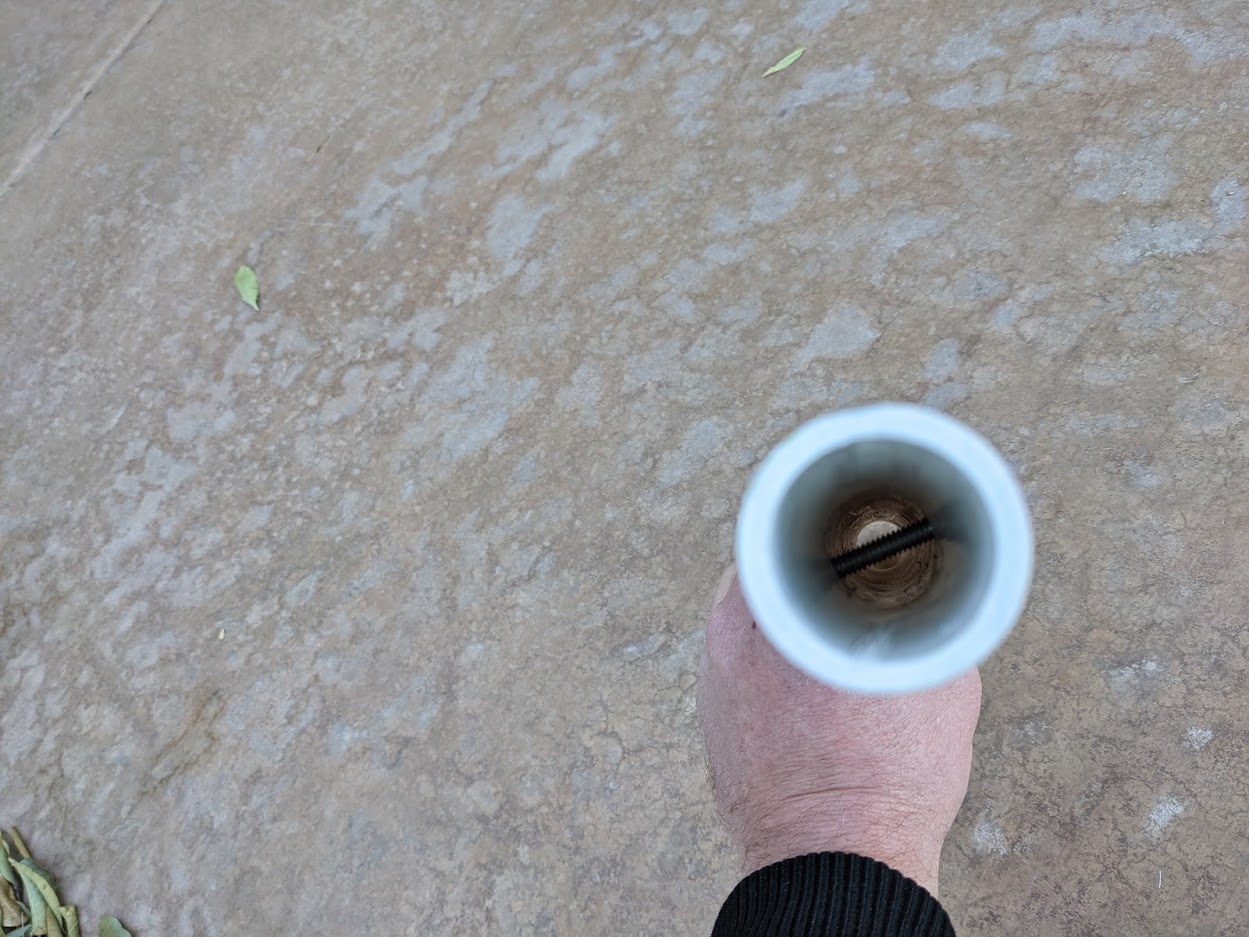
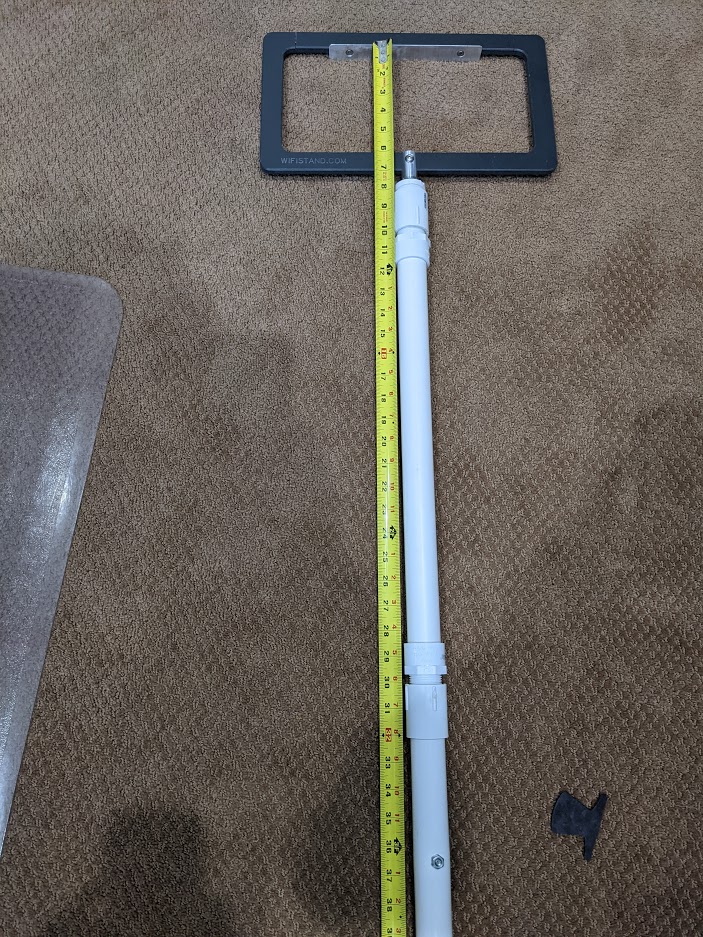
Next, I drilled a 1/4″ hole into the plug. I put a washer into the plug as a guide then drilled the hole so I could make sure it was centered. I then used a 1-in screw, a washer on top, and a nut to fasten this together. By tightening this I was able to suck in the washer that was in the bottom of the plug and thread the screw the proper size until it was tight, for me this was the right amount needed to properly attach and thread the WIFIStand to the extension. I then test fit this cap to one of the PVC Couplings.

I now drilled a 1/4″ hole into one of the 18″ pipes about 5″ down and used the 1-1/2-in screw and nut to hold this in place. This screw will be used to rest on top of the tripod and stop it from continuing thru the extension. On my tripod, I had to remove the small screw that holds. the 1/4 in mount adapter in order to get the PVC to fit over this. However, I tried pulling this out with the screw removed and it was a lot of effort. I think this will stay intact for my usage, but you might want to get some kind of recessed screw to hold this in if you worried.
I now test fit all of these parts securely together and gave it a quick trial run. The WIFIStand setup is about 8 1/2 feet to the t-bar. With 1 of the 18″ and the adaptors to connect this to the tripod. The WIFIStand t-bar is extended to 11′. If using another 18″ pipe would roughly get you to 12 1/2 feet. I have tested this with both of the 18 in pipes together and separately, I have to say I like the stability of just 1 of the 18 in pipes over 2, I feel its a bit top heavy when using 2 of these and trying to wheel it around, I havent done this yet since I dont have a celing high enough to test it on right now, but since I had leftover pipe I figured I would make another in case I wanted to use it eventually.

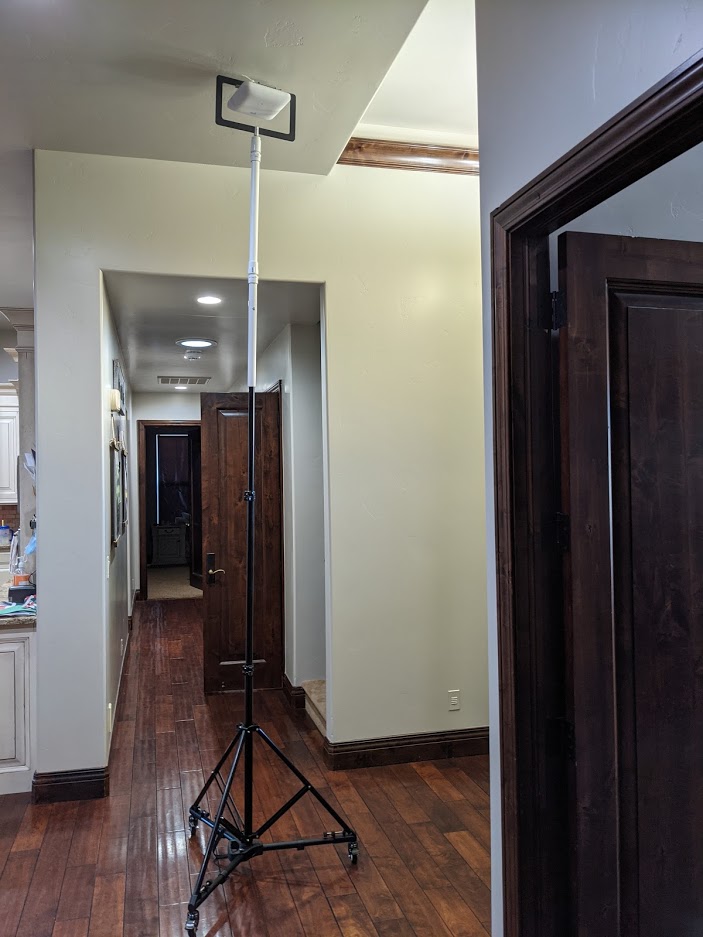
I am waiting for the weather to be a little better before I glue and paint these, but I will say I am happy with how these turned out and it seems to be a great option for extending the APoS survey kit.
I hope you found this helpful, if you have any questions, comments, or things I can do to improve this please let me know. Thank you for taking the time to read this.